Hey! We may earn an affiliate commission when you buy through links on our site. Every product I recommend is one I personally use or have worked with via my clients and love. Thanks in advance for your support!

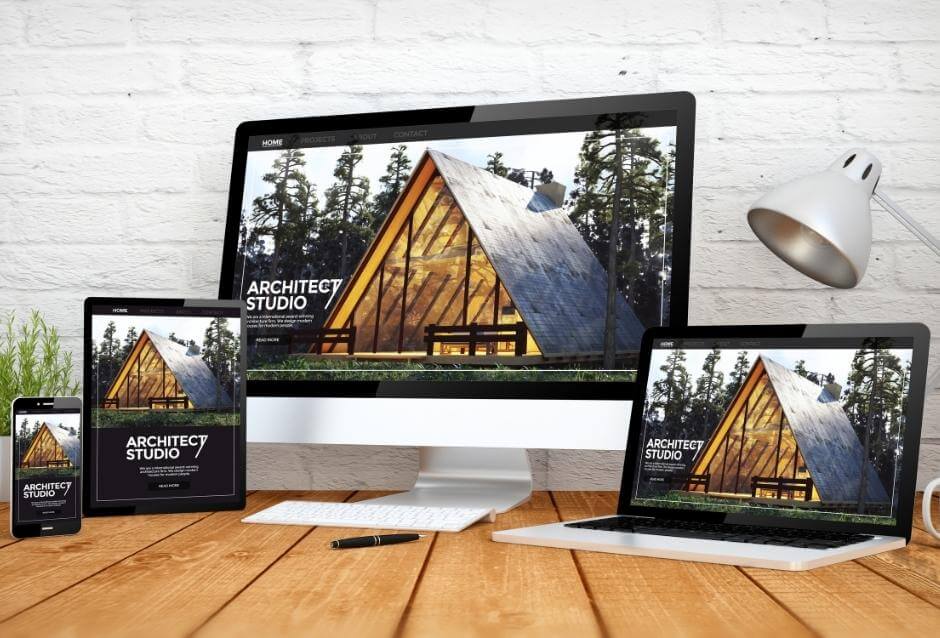
In today’s digital age, your business needs to shine online with a sophisticated, appealing presence that authentically represents your company. When it comes to setting up your own website, the process might seem a bit daunting, though. But with this website-building tutorial for beginners, you’ll have a finished, gorgeous website up and running in no time. Here’s why WordPress is your best bet and a helpful tutorial on how to get started.
Why Most People Prefer To Build Their Website With WordPress.
- Flexibility: From blogs to e-commerce sites, WordPress supports all types of websites.
Picture WordPress as a versatile toolbox, much like a Swiss Army knife for building online spaces. Whether you’re looking to start a personal blog to share your thoughts and adventures, or want to open a consultancy and sell your expertise, WordPress has you covered.
It’s like having different tools and materials at your disposal, each tailored for different projects. So, no matter what your online dream might be – from sharing stories to promoting your plumbing business – WordPress makes it possible without requiring you to be a tech expert. It’s the go-to platform that adapts to your needs, whatever they may be.
- User-Friendly: Even if you’re not tech-savvy, you can create a business website with WordPress without knowing a single line of code.
Imagine wanting to bake a pie, but you’ve never been to culinary school. You’re handed a recipe book that’s straightforward, with step-by-step instructions, pictures for every step, and even some tips for beginners. Suddenly, baking doesn’t seem so daunting, right?
That’s what WordPress is like for building websites. WordPress is your friendly guide even if you’re a self-described technophobe or don’t know the first thing about coding. It’s designed with you in mind – those with big ideas but perhaps not the tech background. With its intuitive layout and easy-to-follow tools, WordPress ensures that creating a professional-looking website feels more like following a recipe, rather than assembling a complicated jigsaw puzzle.
- Vast Library of Themes and Plugins: These two valuable components allow you to customize your site to your heart’s content.
Themes modify the design of your WordPress website. They change how your site displays and appears. I’m sure you have seen how different every website tends to look. Compare Amazon.com to MarthaStewart.com. Or Netflix.com to Hulu.com even. The latter basically offer the same service but still look and behave totally different. Part of that reason is the theme (design) they have chosen.
Plugins are small programs that help with very specific tasks on your site such as speeding up a slow website. Think of them like an app on your smartphone. Each app serves a really specific purpose. One allows you to shop on Amazon and another allows you to check your email. That’s what plugins are like. There are plugins that will help your website content be even more SEO friendly and plugins that capture spam comments on blog posts so you don’t have to deal with them. That’s just the tip of the iceberg though! There are thousands of plugins out there.
- Search Engine Optimization (SEO) Ready: WordPress is built with SEO in mind. It allows for easy optimization to make sure your site is noticed by search engines such as Google and Bing.
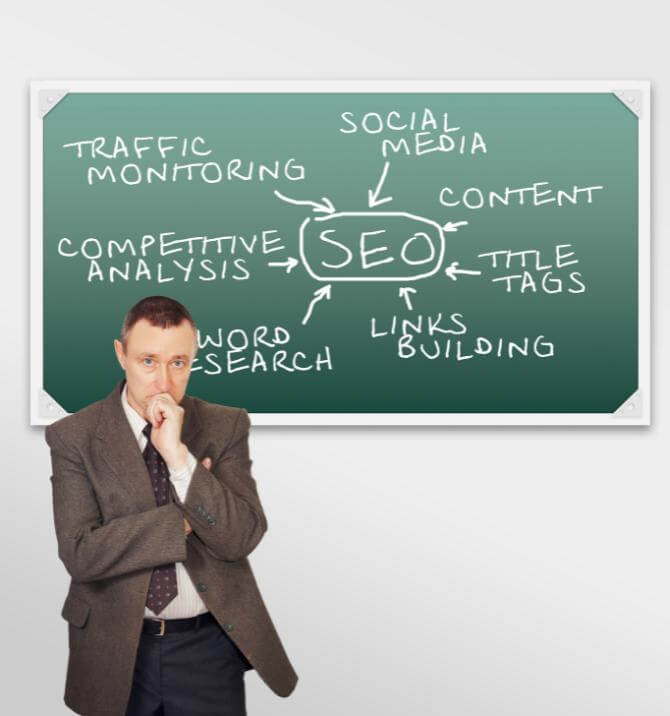 Imagine you’ve opened a brand-new store in a bustling city, but it’s tucked away in a quiet alley. Now, unless people specifically know about it or stumble upon you, it’s hard to get foot traffic, right? This is where SEO, or Search Engine Optimization, comes into play for websites. Think of SEO as your digital signboard, pulling in people from the busy streets of the internet. Simply put, SEO helps your website stand out amidst the huge online crowd so that when someone searches for something you offer, your website shows up.
Here’s the great news for those of us who aren’t tech wizards: WordPress is designed with SEO in mind from the get-go. Think of WordPress as a store designer who knows exactly where to place the signboard, how to make the display windows appealing, and ensures the entrance is inviting.
It’s made so that even if you’re not an SEO expert, your website has a better chance of appearing when potential customers search for topics related to your business. In essence, WordPress provides the foundations to make sure your digital ‘store’ isn’t hidden away, but is right there on the internet’s main street.
- Community Support: With millions of users worldwide, there are a LOT of people out there who can help you with any questions or roadblocks that arise. In my workshop, WordPress Workshop For Non-Techies, we have a dedicated Facebook group to get your questions answered, so you don’t feel like you’re navigating this new world alone. LINK TO MY COURSE HERE
Step-by-Step Guide to Creating Your Website With WordPress.com
Are you ready to get started building your WordPress site now?!?
Step 1a. Set Up Your Domain and Web Hosting:
Decide on a domain URL that represents your business (e.g., yourbusinessname.com) and purchase it from one of the many domain name providers out there. Here’s the one I use.
Pro tip 1: Get creative if your domain name choice isn’t available. Can you change the extension from .com to .net? Can you add anything to the name to make it still work for you? A couple of things I do caution against is trying not to add a dash in the URL. People have a hard time remembering those. I also wouldn’t make the url too long. For example, kathrynsdogwalkingandgroomingbusiness.com might be a bit too long. 😉 That too will be hard to remember.
Pro tip 2: You always want your domain name to be hosted by a different company than your web host. This way if something happens to one company, you always have access to the other. Having said that, I have not ever heard of a domain hosting company going out of business. They either sell or merge. Better to be safe than sorry though, yes? 😉
Find a reputable web hosting provider. Many hosting providers offer one-click WordPress installations, which is beautiful and will save you a lot of pain and heartache when you set your website up. You also want to find a company that makes tech support a priority. You know that old adage “You get what you pay for”? Well, when it comes to web hosts, that is definitely the case! Here’s the one I use. They’re amazing!
Step 1b. Connect the nameservers.
Now this gets into the nitty gritty a bit but its really, really important. Since your domain name was purchased at one website and your webhost was purchased at another, you need to tell your domain name company who your webhost is – and this is through an ip address called a nameserver. Now, normally what I do is Google “nameservers for <insert my webhost here>”. You are looking for something that looks like this:
- ns1.bigscoots.com
- ns2.bigscoots.com
There are always at least two. Now, you will take these addresses and add them to your domain host. Go through their help or support to find out where to add these.
I know this sounds a bit complicated but I believe in you. You got this!
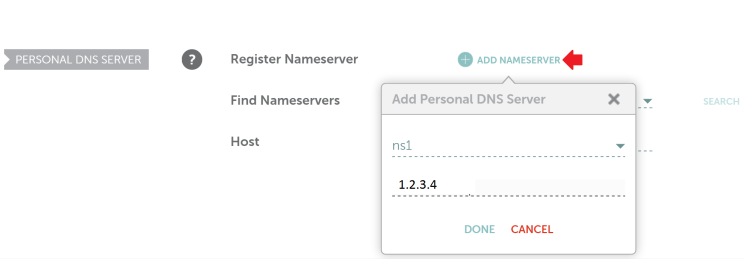
Source: BigScoots
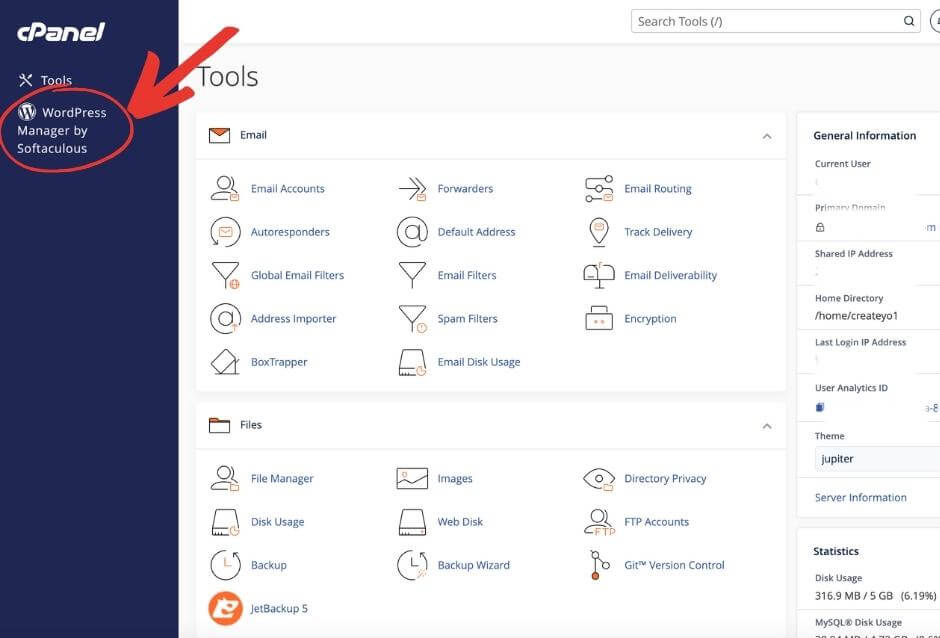
Step 2. Installing WordPress to your new website:
Many web hosts have something called a CPanel (short for Control Panel). Usually, it means they offer an easy one-click WordPress install. I can’t emphasize this enough. For your sanity’s sake, definitely use it!
If you’re old school though and like to do things from the ground up, follow these tutorials on how to create a website using WordPress from the WordPress.org website.
The CPanel will ask you to create a username and password and put in an administrator email (Pro tip: Use your own email address here. This is really important as it will allow WordPress to send you any notifications it feels is important – including password resets!), and ask few other things. The big three that you want control of right away though are username, password, and admin email.
Pro tip 1: For the username, don’t ever use ‘admin’. It’s the de facto username that hackers use to try to break into your website. I tend to call mine something like garden_admin or maybe for a coaching business, I might call it loveyourself_admin. The underscore is not typically used so it adds a small level of additional security to your username.
Pro tip 2: Make sure your password is a TOUGH one. Fortunately, WordPress will take any characters in the password field. I like passphrases. For example, I might use the passphrase ‘I love pumpkin spice ALL y3ar long!!’ That would definitely be a challenging one to break into given all the spaces, the cap, and the number 3 thrown in. The reason I like the passphrase is we tend to remember them better.
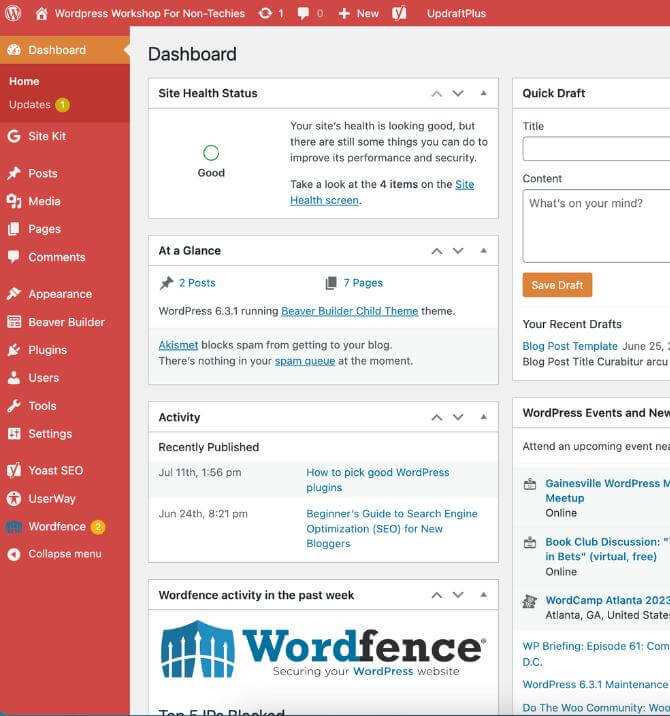
Once your WordPress is installed, you can access your website through the WordPress dashboard. The URL is usually something like this: https://yourwebsite.com/wp-login.php. After you install WordPress to your website with the Cpanel, it will also give you your new login link.
Step 3: Choosing a Theme for your website:
On the left-hand side of the dashboard, navigate to Appearance > Themes > Add New. Browse or search for a theme that fits your business.
Pro tip: I don’t ever suggest ‘free’ themes as they really limit your ability to be creative. Also, if the creator of the theme stops updating it, then your website may become vulnerable to hackers because the theme is not being updated. There are tons of professional themes out there (that you most likely will pay an annual or one time fee for) which will give you more flexibility and protect your site from creeps in basements who have nothing better to do with their time than find websites to break into. Remember, all costs associated with building your site are considered a cost of doing business and are tax deductible.
Install and activate your chosen theme.

Step 4. Customizing Your Site:
On the left-hand side of the dashboard, navigate to Appearance > Customize. This is where you can customize your site colors, fonts, and layout options. Remember, consistency with your brand is important so if you already have business colors chosen, use these colors for your site, too.
I usually recommend a different color for hyperlinks than your text color. You want something that stands out. I know companies who use red for their hyperlink. I like both bright blue and orange. Remember, a confused buyer doesn’t buy so if they can’t tell a hyperlink is a hyperlink then you’ve just lost a potential sale.
Set a static homepage if you prefer a traditional website look over a blog layout. I always do this. You can find where to set your home page in that same Dashboard in Settings > Reading. Make sure your home page is actually published first or it won’t show up as an option.
 Step 5. Adding Essential Plugins:
Navigate to Plugins > Add New. Search for and install plugins like Yoast SEO for search engine optimization, Akismet for spam comment protection, and IThemes or Wordfence for security. It’s not enough to just install them though. You’ll need to go into each plugin and set them up. Plugins like Akismet will ask you to create an account on their website to get an API key. I use Akismet on all of my sites where I blog.
Pro tip: When searching for plugins to use, confirm the plugin is compatible with your version of WordPress and has been updated recently. Old, abandoned plugins are the quickest way for your site to get hacked. Also, you want it to have a ton of really positive reviews.
Step 6. Creating Your Core Pages:
Start with the essential pages like Home, About Us, Services/Products, Blog, and Contact.
Navigate to Pages > Add New for each page. Use the WordPress editor to add a title, content, images, and videos.
Pro tip: Remember that every word you write needs to be in the context of WIIFM where your prospects are concerned – especially when it comes to your Home page and About page. Does your prospect care you spend 3 months every year on the beach in the Caribbean? Maybe. Maybe not. If you are an accountant, probably not. If you are a money coach, then most likely, yes.
Think about these things: What headline will capture their interest? How can you write your product description that will make them swoon with desire? What would you like to read or see that would attract you to you?
Stalk other websites for inspiration if you’re feeling a bit stuck.

Step 7. Setting Up Your Menu:
When your pages are created and ready for the world to see, go to Appearance > Menus. Name your menu, add your pages, and set the display location. The Primary Menu is the top menu you see on most websites. Consider that prime real estate territory so you want your most important pages listed there.
Pro tip: I always put my legal pages and Contact page down in the footer menu. This way they’re all still displayed but not taking up the valuable space in the primary menu.
Step 8. Optimizing for SEO:
Imagine your website is a book in a massive library called the Internet. “Optimizing for SEO” is like giving that book a vibrant cover and a catchy title, and placing it on the front shelf where everyone can see it. It’s about making your pages and posts more noticeable and appealing, so when someone enters the library looking for a book on a topic you cover, yours is one of the first they pick up.
In simpler terms, when you “optimize for SEO,” you’re making tweaks and changes to your pages and posts to ensure search engines like Google can easily find, understand, and display your site when someone searches for related topics. This is where the concept of keywords comes in.
A keyword is basically a phrase people enter into search engines to find an answer to their question/concern, etc. For example, you might go to Google and type in ‘size 8 women’s tennis shoes’ or ‘recipe for pumpkin spice latte’.
And any phrase that is longer than 5 words is considered a long-tail keyword. This usually means someone is very focused on a specific need or want.
For example, it might be ‘size 8 women’s tennis shoes with arch support’ or ‘life coach that specializes in weight loss for men’. Can you see how much more specific that is? When we enter a keyword like that, we’re on a mission to solve a problem and are usually in buying mode! And you want to be right there in the front row where they can see you. This is where optimization comes in.
Remember that Yoast SEO plugin I mentioned? You will use this to ‘optimize’ your pages and posts by adding meta titles, meta descriptions, and focus keywords. Yoast has some excellent tutorials explaining all of this so I highly recommend you take the time to watch them.
Also, make sure your images are optimized for web use (i.e. you don’t want them to be too large. I recommend they’re never larger than 2000px wide or high) and add descriptive alt text to them.
The descriptive alt text field will appear when you go to add an image to your site. I usually use that field to put a keyword into. For example, if I were adding an image to this particular post, I might put the phrase ‘How to build your own website’ into that field knowing that’s one keyword I want to be found for when people are searching for that topic.
Step 9. Launch and Monitor:
Once you’re satisfied with how your site and pages look, hit the ‘Publish’ button on everything.
Use websites like Google Analytics to monitor your visitor activity. They have a plugin called Site Kit by Google that I also recommend you add to your site. This will make connecting to Google Analytics easy peasy.
Regularly update your content (Search engines love fresh content). Also, make sure you’re regularly updating your themes and plugins to ensure your site stays safe and everything runs smoothly.
Creating a website can definitely appear daunting at first but, with the right tools, such as this website-building tutorial for beginners, it becomes more reachable. As you start down this path, remember that every expert was once a beginner, too. With determination, patience, and a willingness to fail until you succeed, you’ll soon have your own website built. Dive in, keep experimenting, never give up, and watch your online business presence soar.
